Select your current app version for best support
How do I create an ePak for signature?
It gives you an option to create a single ePak or compose multiple ePaks using our ‘Batch Compose’ feature. To know more about ‘Batch Compose’ please refer to What is ‘Batch Compose’? and How do I send multiple ePaks at once?
To create a single ePak:
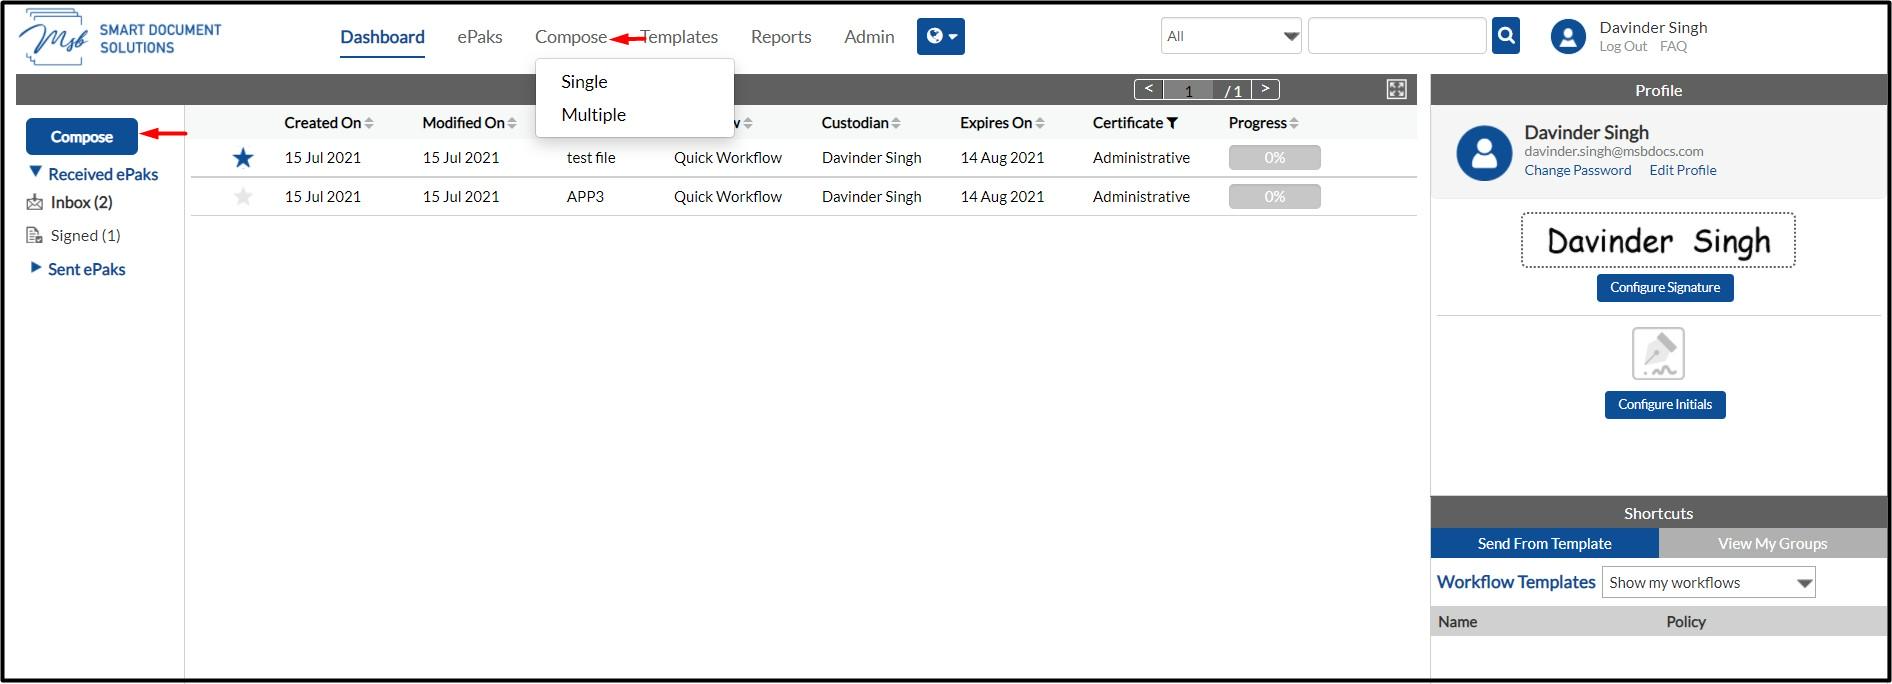
- Click on the Compose tab available in the main navigation bar at the top of the page and choose single or you may choose the Compose button just above the ePak folders on the Dashboard.
- Click Attach.
- You can choose to upload a file from
- Your system
- My Documents (previously uploaded files)
- Existing document templates
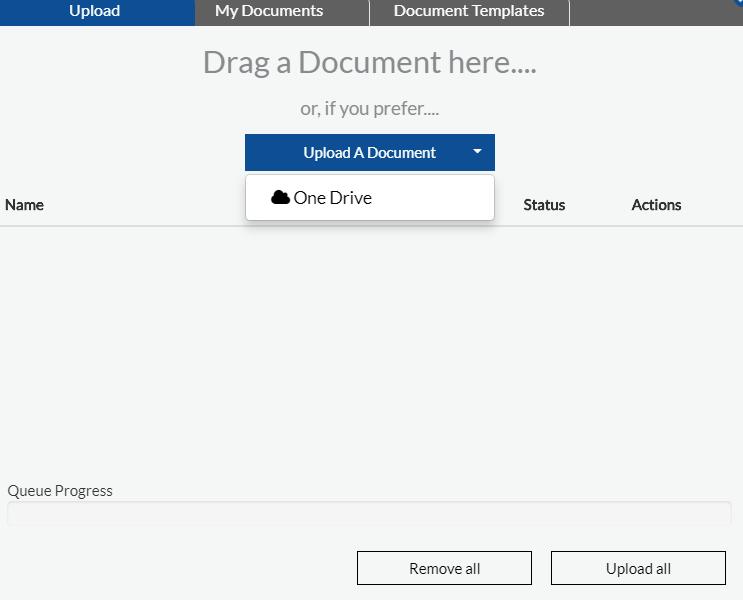
- OneDrive (If configured for your instance)
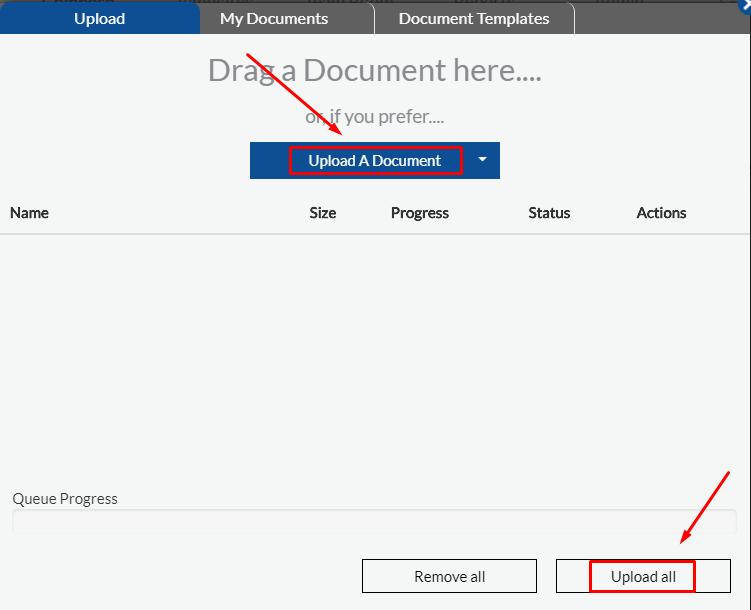
- To choose from available documents in your system, click upload and navigate to the location for the file, select it and click the Open button.
If OneDrive has been enabled for your instance, as a custodian you will have an option to select OneDrive from the drop down.
- You may choose to upload multiple files at one time.
- Then click on Upload all and all the uploaded documents will get attached to the ePak on the compose page.
- Optionally, to choose from previously updated documents- enter text for a Document Name in the search box and it displays the specific document(s) from the list of available documents that will match the criteria.
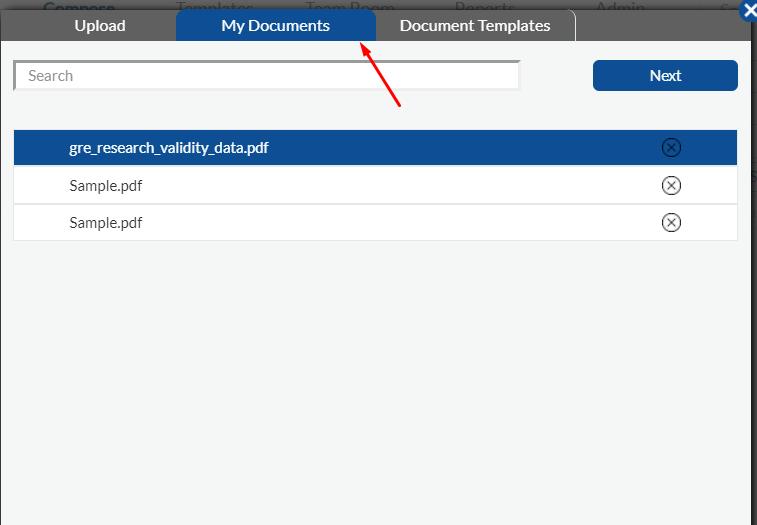
- Upon clicking Next, the document(s) will be loaded in the document preview on the compose page.
- Now you may either use an existing Workflow or create a quick workflow.
- To use an existing workflow, click the icon on the workflow tab and choose ‘Use existing’.

- A pop up with the list of existing workflows appear and you may choose from the list. Once selected, the workflow name, the certificate policy, the users and other attributes like tags and special instructions will auto-populate in the respective fields.
- You will then need to configure signatures.
- You may drop Signature tags on each document for each signer. Signature tags will be available on top of the preview panel depending on the signing policy in the workflow. It will require a signature block per signer in the Workflow, on at least one of the attached documents.
- Alternatively, you may select to turn on ‘Auto-Append’ signatures. Doing so will automatically append signatures to a new page at the end of the document for all signers within the workflow. You will not need to place signature tags if you select to turn on ‘Auto-Append’.

- Fill in the subject field. If left blank, the field will get auto populated with the name of the first document associated with the ePak.
- You may optionally set an expiry date for your ePak. It will not allow you to set the date beyond the Retention period for the ePak. Note: It can now be configured to set expiration and retention dates for an ePak either from the last action date or the ePak’s create date. This is a system level configuration and cannot be controlled by individual users.
- As a custodian and depending on the system configuration, you will have several other settings to choose for your ePak. These are as follows:
- Allow delegation- This feature will allow you to control whether or not an ePak can be delegated further by the signer in the workflow.
- Email Attachment Type- This feature will allow you to control which kind of attachment is sent to all users in the workflow upon ePak completion. Every signing policy will have a default value set against it, but a custodian can override it while composing the ePak. The default value will be configurable on your instance and can be set as desired. Refer to ‘How do I use the Email Attachment Type feature’?
- Archive- In case of Selective LTS on your instance, this feature will allow you to designate whether or not the ePak will be archived after it is completed and reaches its retention date.
- FastWeb View- This feature will allow you designate if you would like app to maintain FastWeb view for your ePak.
- CC users: To send the signed completed document(s) to an email recipient by entering the email address (es) in the CC field.
- Special Instructions: To add special instructions for the recipient (this message will appear in the email notification that is sent to the Recipients). This field allows you enter maximum of 512 characters.
- Smart Tags: To add a Smart Tag (Keyword Tags) in the form of key value pair. It can be configured to provide a list of predetermined smart tags to the Custodian.
- Allow signer attachment: This option will let you control if your signers are allowed to attach supplement documents to the ePak or not.
- Secure Documents: You can now add an extra level of security to your ePaks while sending them out for signatures/review by securing them with a password. The same password will be required by the recipients to access the ePak.
- Once done, you may click on Send and your ePak will be created.
- A success message will appear on your screen.
- Alternatively, to create an ePak with a quick workflow, you may upload the document(s) and manually enter all the workflow details like certificate policy, states and signers and repeat Steps. 13 and 14. Note: If the system is configured so, you will be able to select signing policy for each workflow state in your ePak. By default, the ePak level signing policy will be applicable to all workflow states unless selected otherwise. This will give you more power to get same ePak signed by different signers with the authentication methods apt for each one of them.

If both electronic and digital signing policies have been configured for your instance, you can choose between both for different workflow states however selecting a digital policy for any workflow state will prevent custodian to use an electronic policy for any state after that. Application with throw an error in case user tries to do it:

MSB gives you an option to create a single ePak or compose multiple ePaks using the ‘Batch Compose’ feature.
To create a single ePak:
1) Click on the Compose tab available in the main navigation bar at the top of the page and choose single or You may also choose the Compose or Quick Compose button on the Dashboard.

2) You can choose to upload a file from Your system, Existing Documents or Document Templates. Once the document is uploaded, you will be navigated to the Manage Documents Page. You may choose to upload multiple files at one time.
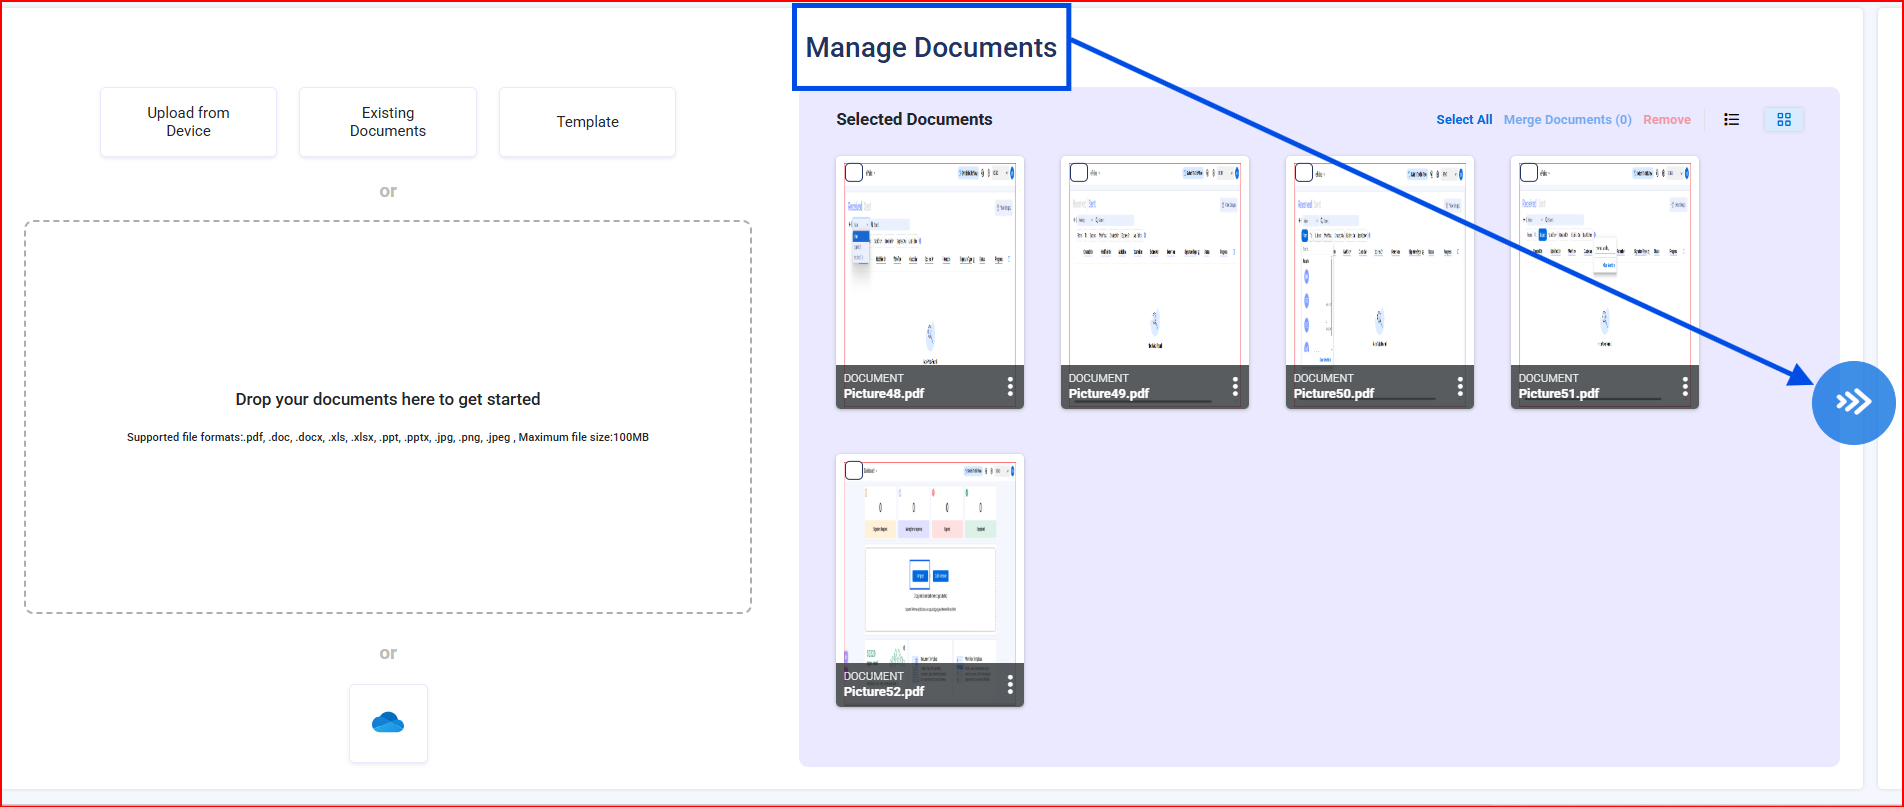
3) Upon clicking Next, you will be navigated to Add Recipients screen where you have an option to use an existing Workflow Template. You may add another workflow state to add more signers. You can also select the Signature Policy you would like to use to create an ePak.

Note: When the configuration for a tenant is updated then only the domains listed in this configuration will be visible in user searches on the specified pages like Compose/Workflow state/User Search / Templates / Profile/Out of Office/Signing ePak/Delegate/CC user. If the email of a user excluded from the “IncludeOnly Domain” configuration is known and entered into the search component, the user should be fully accessible without any limitations.
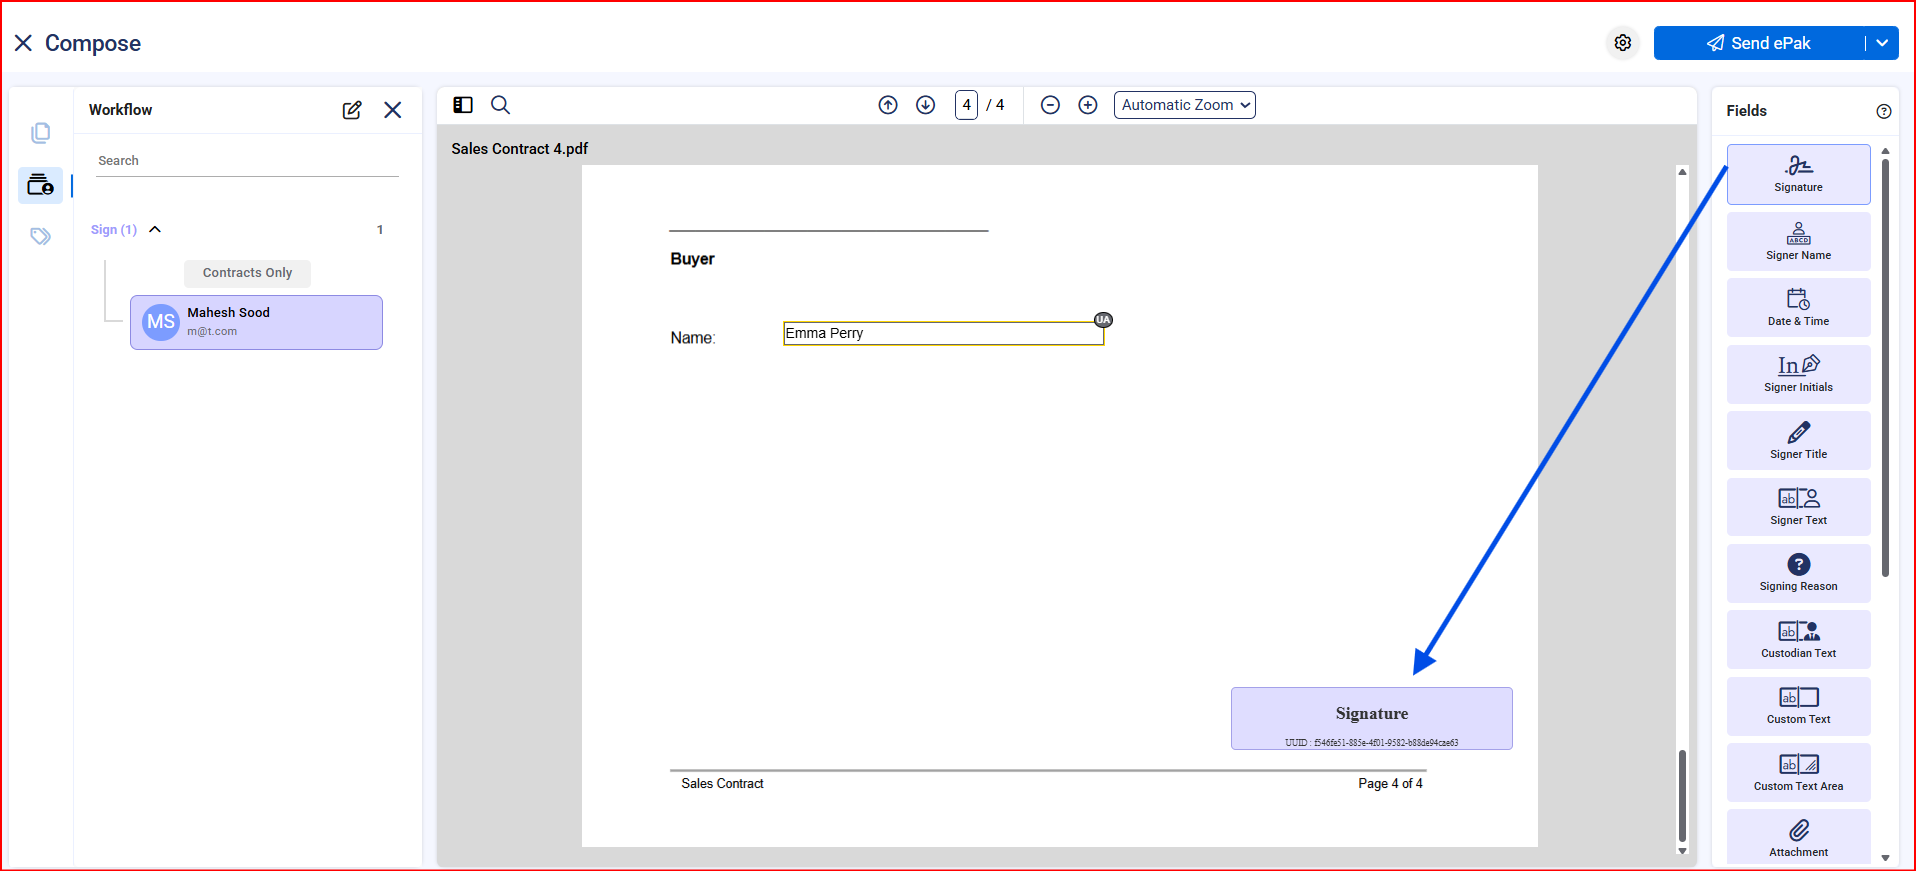
4) Once the Recipients are added, click on Next to drop the Signature Tags on the Document. You may drop Signature tags on each document for each signer. Signature tags will be available on the right side of the preview panel depending on the signing policy in the workflow. MSB requires a signature block per signer in the Workflow, on at least one of the attached documents.
Alternatively, you may select to turn on ‘Auto-Append’ signatures. Doing so will automatically append signatures to a new page at the end of the document for all signers within the workflow. You will not need to place signature tags if you select to turn on ‘Auto-Append’. If configured, Custodians are restricted to place only one signature tag (or any number) per page. This setting can be configured per Signature Policy.
MSB users can drop Radio Buttons as tags on the document while composing an ePak. A radio button can be grouped with others based on the group key. If the Radio button is added or dropped onto the document, it will have the default Group key which is set by the super admin.
Custodians may select an alignment for text tags such as Custodian Text, Custom Text, and Signer Text. Once selected the same alignment should appear while composing and signing the epak, depending on a tag. If the alignment is not selected then the tag should have left alignment by default.
If MSB signer encounters a date reminder tag while composing or signing, users will be able to select a backdate from the date picker provided by the reminder tag. The selected backdate will be filled in the document’s reminder tag and visible on the signed document.
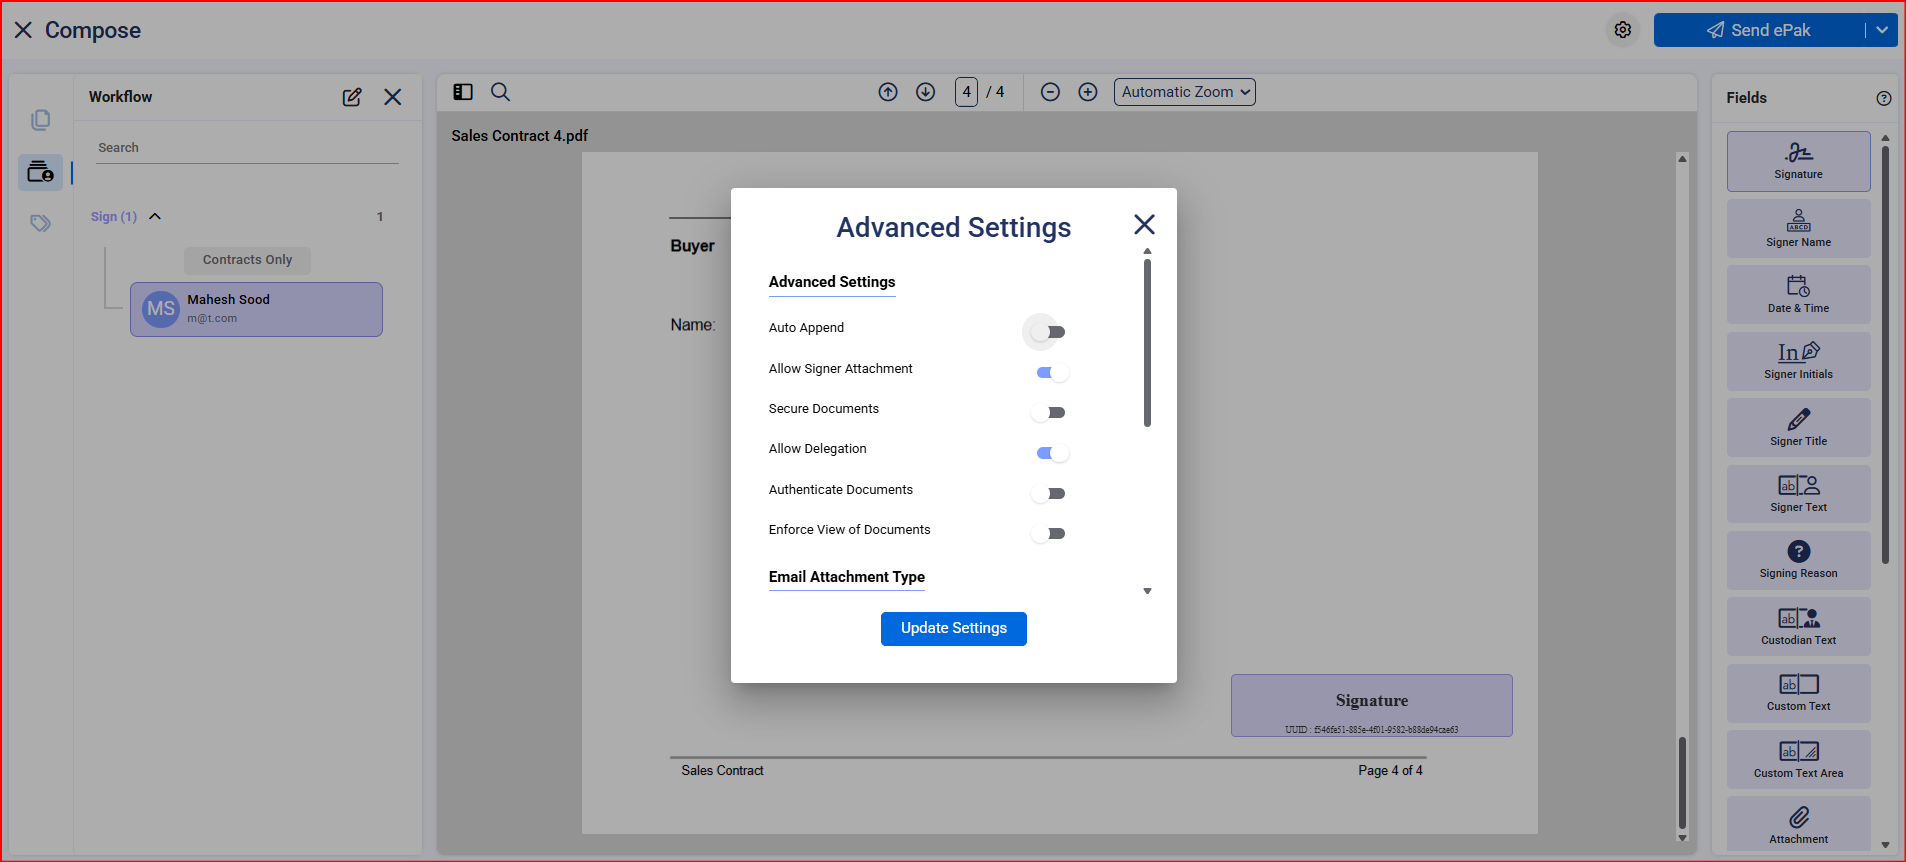
As a custodian and depending on the system configuration, you will have several other settings to choose from for your ePak. Click on the gear icon to view the advanced settings:
-Allow delegation- This feature will allow you to control whether an ePak can be delegated further by the signer in the workflow.
-Email Attachment Type- This feature will allow you to control the type of attachment sent to all users in the workflow upon ePak completion. Every signing policy will have a default value set against it, but a custodian can override it while composing the ePak.
-Archive-In the case of Selective LTS on your instance, this feature will allow you to designate whether the ePak will be archived after it is completed and reaches its retention date.
-FastWeb View- This feature will allow you to designate if you would like an app to maintain FastWeb view for your ePak.
-Smart Tags/Labels: To add a Smart Tag (Keyword Tags) in the form of key value pair. MSB can be configured to provide a list of predetermined smart tags to the Custodian.
-Allow signer attachment: This option will let you control if the signer is allowed to attach supplement documents to the ePak or not.
-Secure Documents: You can add an extra level of security to your ePaks while sending for signatures/review by securing them with a password. The same password will be required by the recipients to access the ePak.
5) Once done, you may click on Send ePak. On the ePak Summary screen, fill in the subject field and add any special instructions for the recipient (if any). To send the signed completed document(s) to an email recipient, enter the email address(es) in the CC field. Custodians may select whether ePak CC recipients receive epak notifications for every action taken on the ePak or only a notification that the ePak has been completed. You may optionally set an expiry date for your ePak. It will not allow you to set the date beyond the Retention period for the ePak.

6) Click on Send and a success message will appear on your screen.
If the system is configured so, you will be able to select a signing policy for each workflow state in your ePak. By default, the ePak level signing policy will be applicable to all workflow states unless selected otherwise. This will give you more power to get the same ePak signed by different signers with the authentication methods apt for each one of them.
If both electronic and digital signing policies have been configured for your instance, you can choose either for different workflow states however selecting a digital policy for any workflow state will prevent custodian to use an electronic policy for any state after that. Application with throw an error in case user tries to do so.

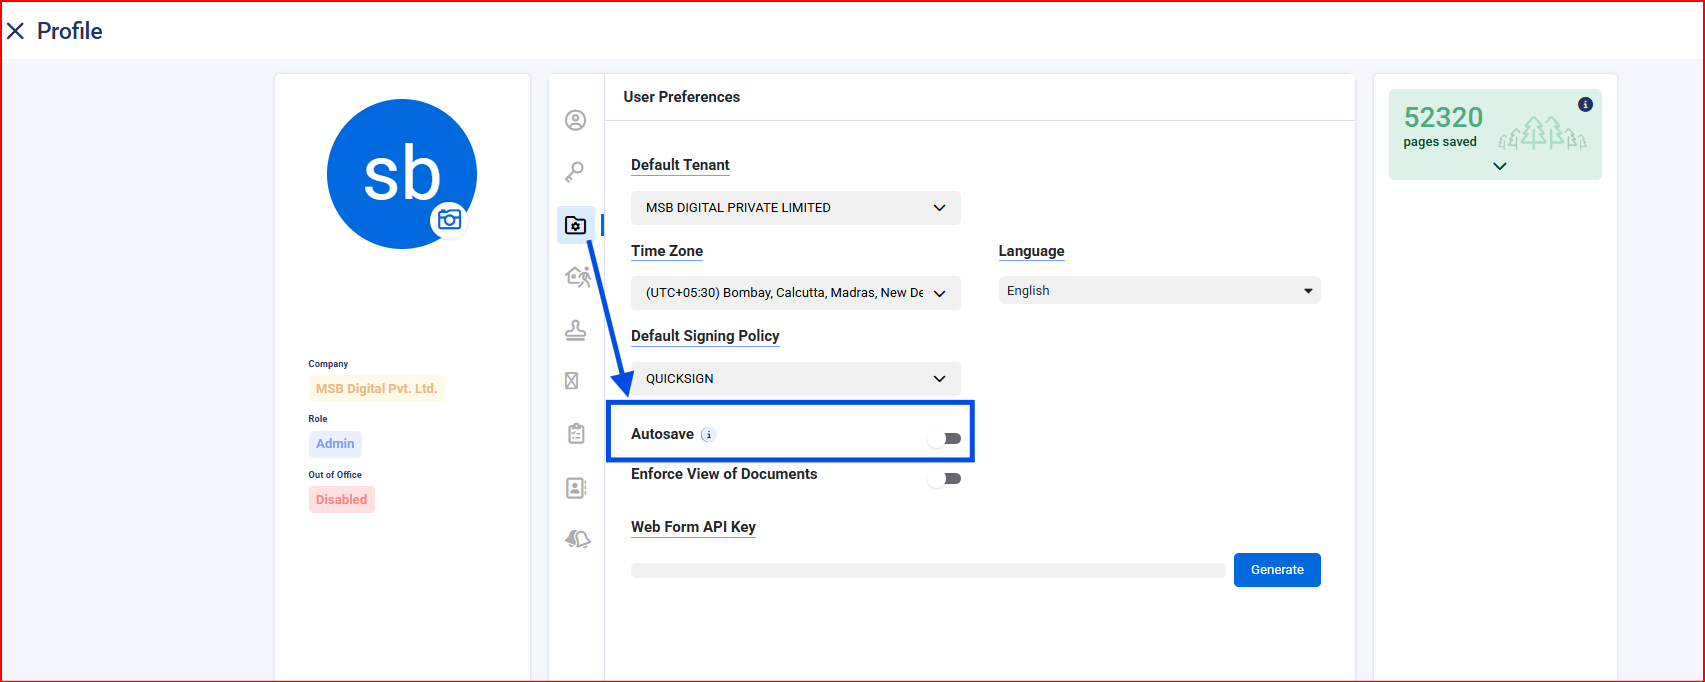
If the auto save toggle is on and the compose process gets halted, ePak will automatically get saved in drafts, ensuring that the work is continuously and securely saved. This option is available in User Profile under User Preferences.